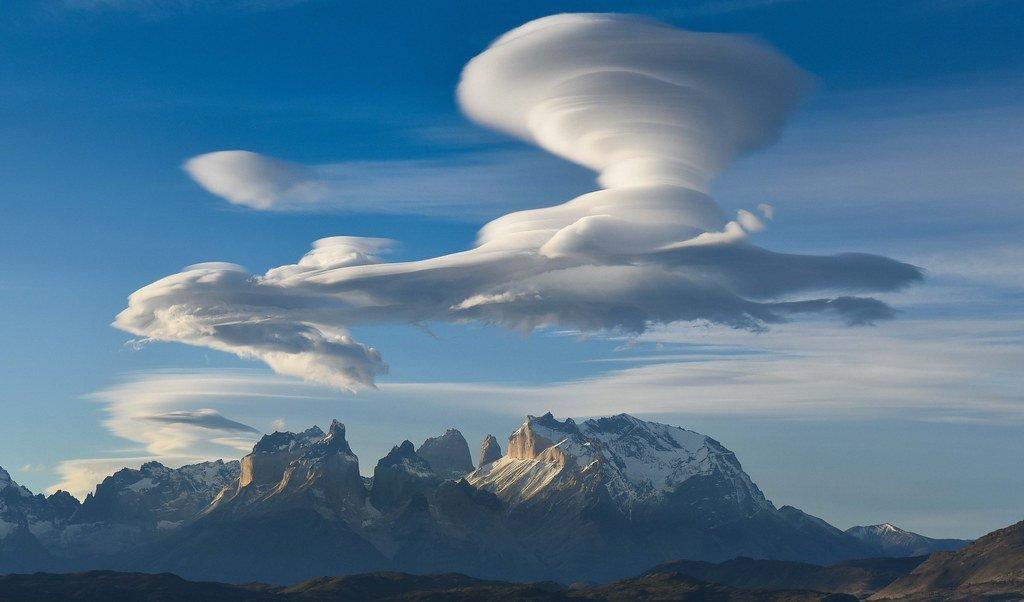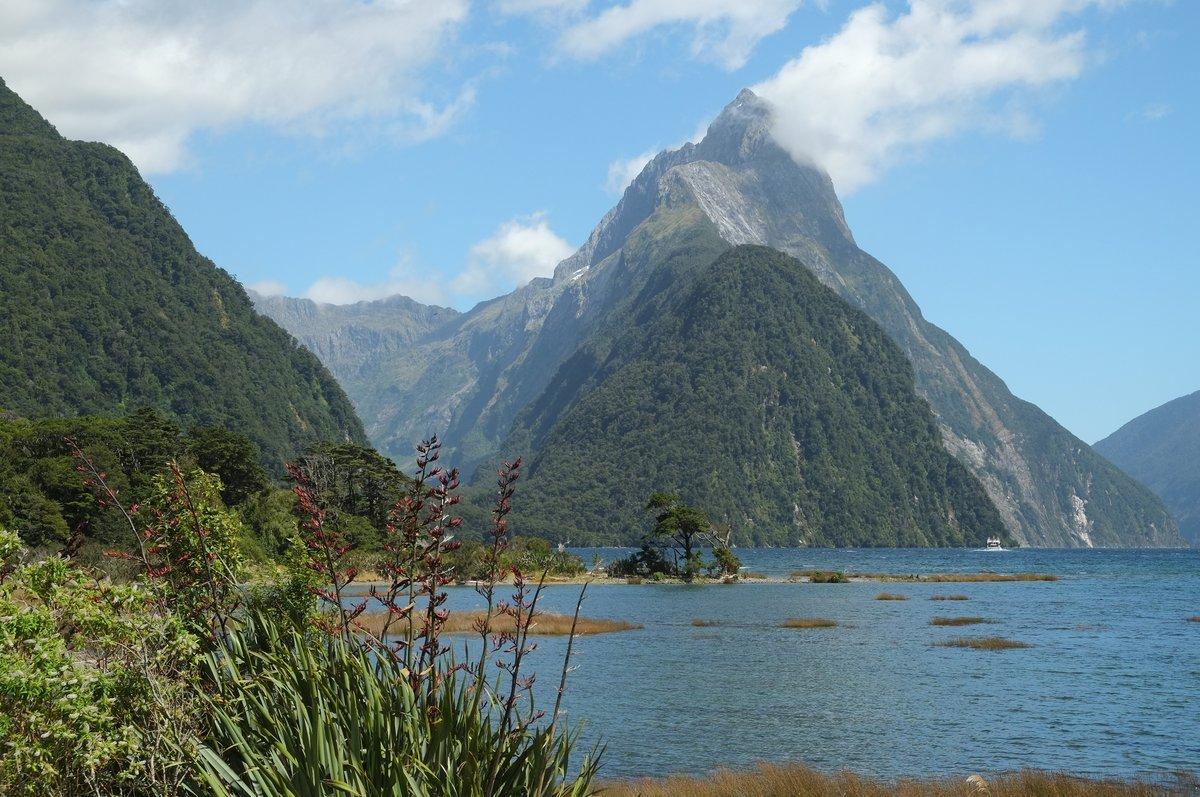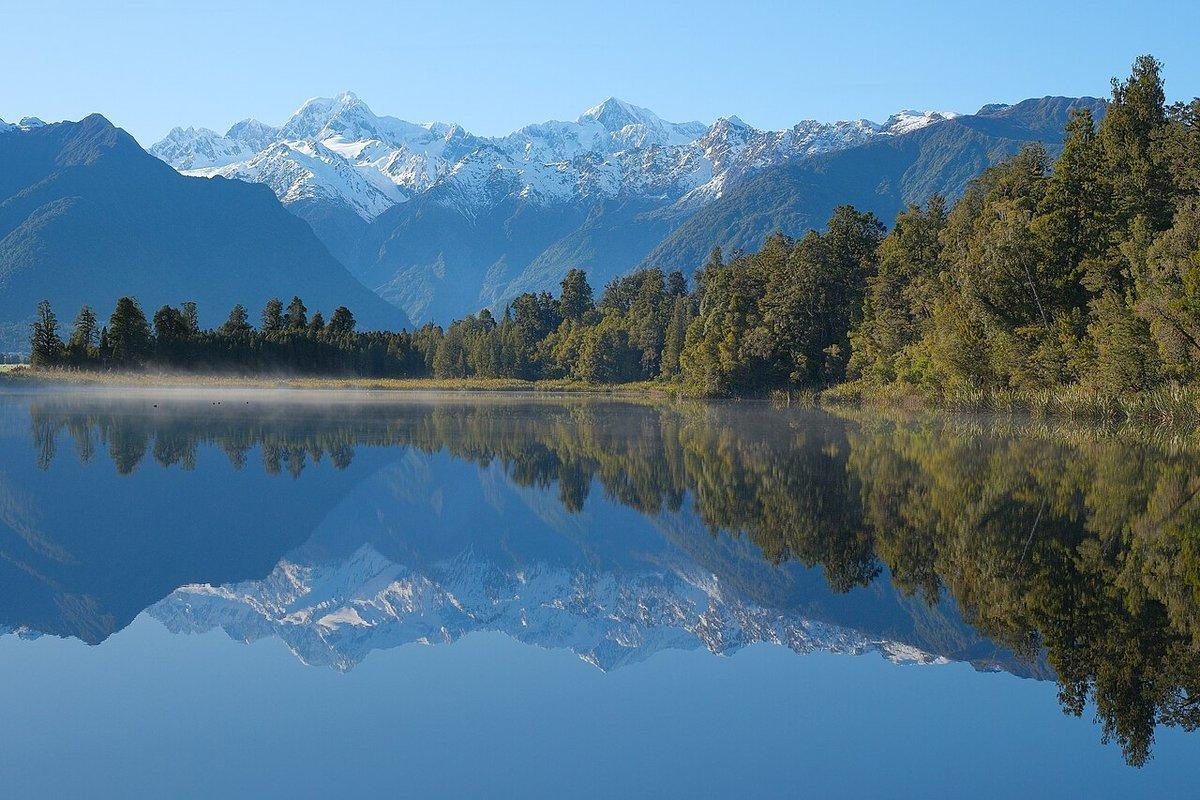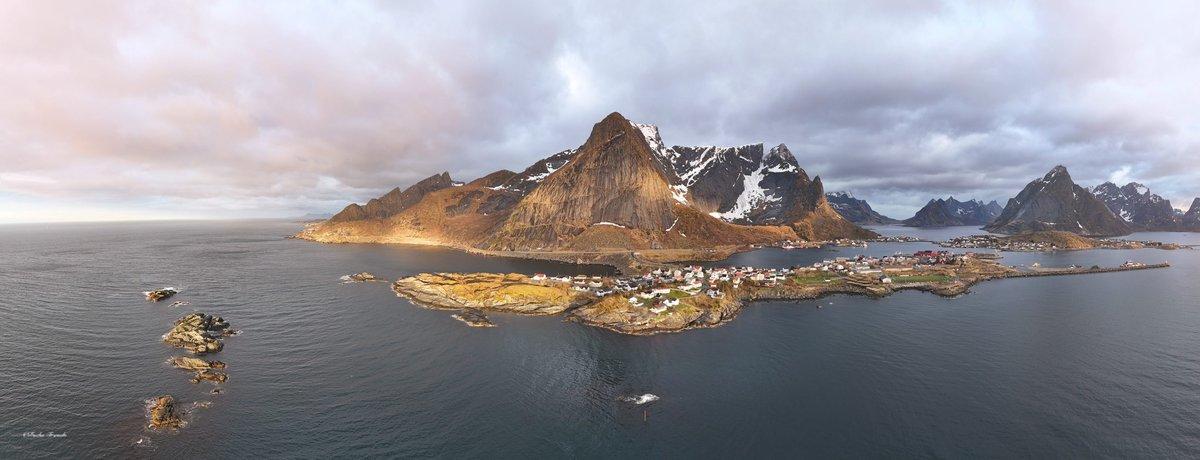
Lofoten is a 200-kilometer chain of islands extending into the Norwegian Sea above the Arctic Circle at 68° North latitude. By any reasonable measure, it should be a barren, frozen wasteland. Instead, the Gulf Stream delivers mild ocean air that meets glacially carved granite peaks, creating a landscape so dramatic it looks fabricated.
Vertical mountains erupting from sea level. Red fishing cabins (rorbuer) clustered on rocky shorelines. White sand beaches that could pass for the Caribbean if the water weren’t 8°C. Northern lights dancing above fjords that mirror entire mountain ranges. This is not a subtle destination. Lofoten hits you with visual impact on every turn of the road.
The archipelago has become one of the world’s most photographed destinations for landscape work. Photographers like Benjamin Hardman and Max Rive have built international reputations on images from these islands. The challenge is no longer finding the locations — it’s timing your visit for the right light, the right conditions, and the right season. And of those three variables, the season question has an answer most photographers get wrong.
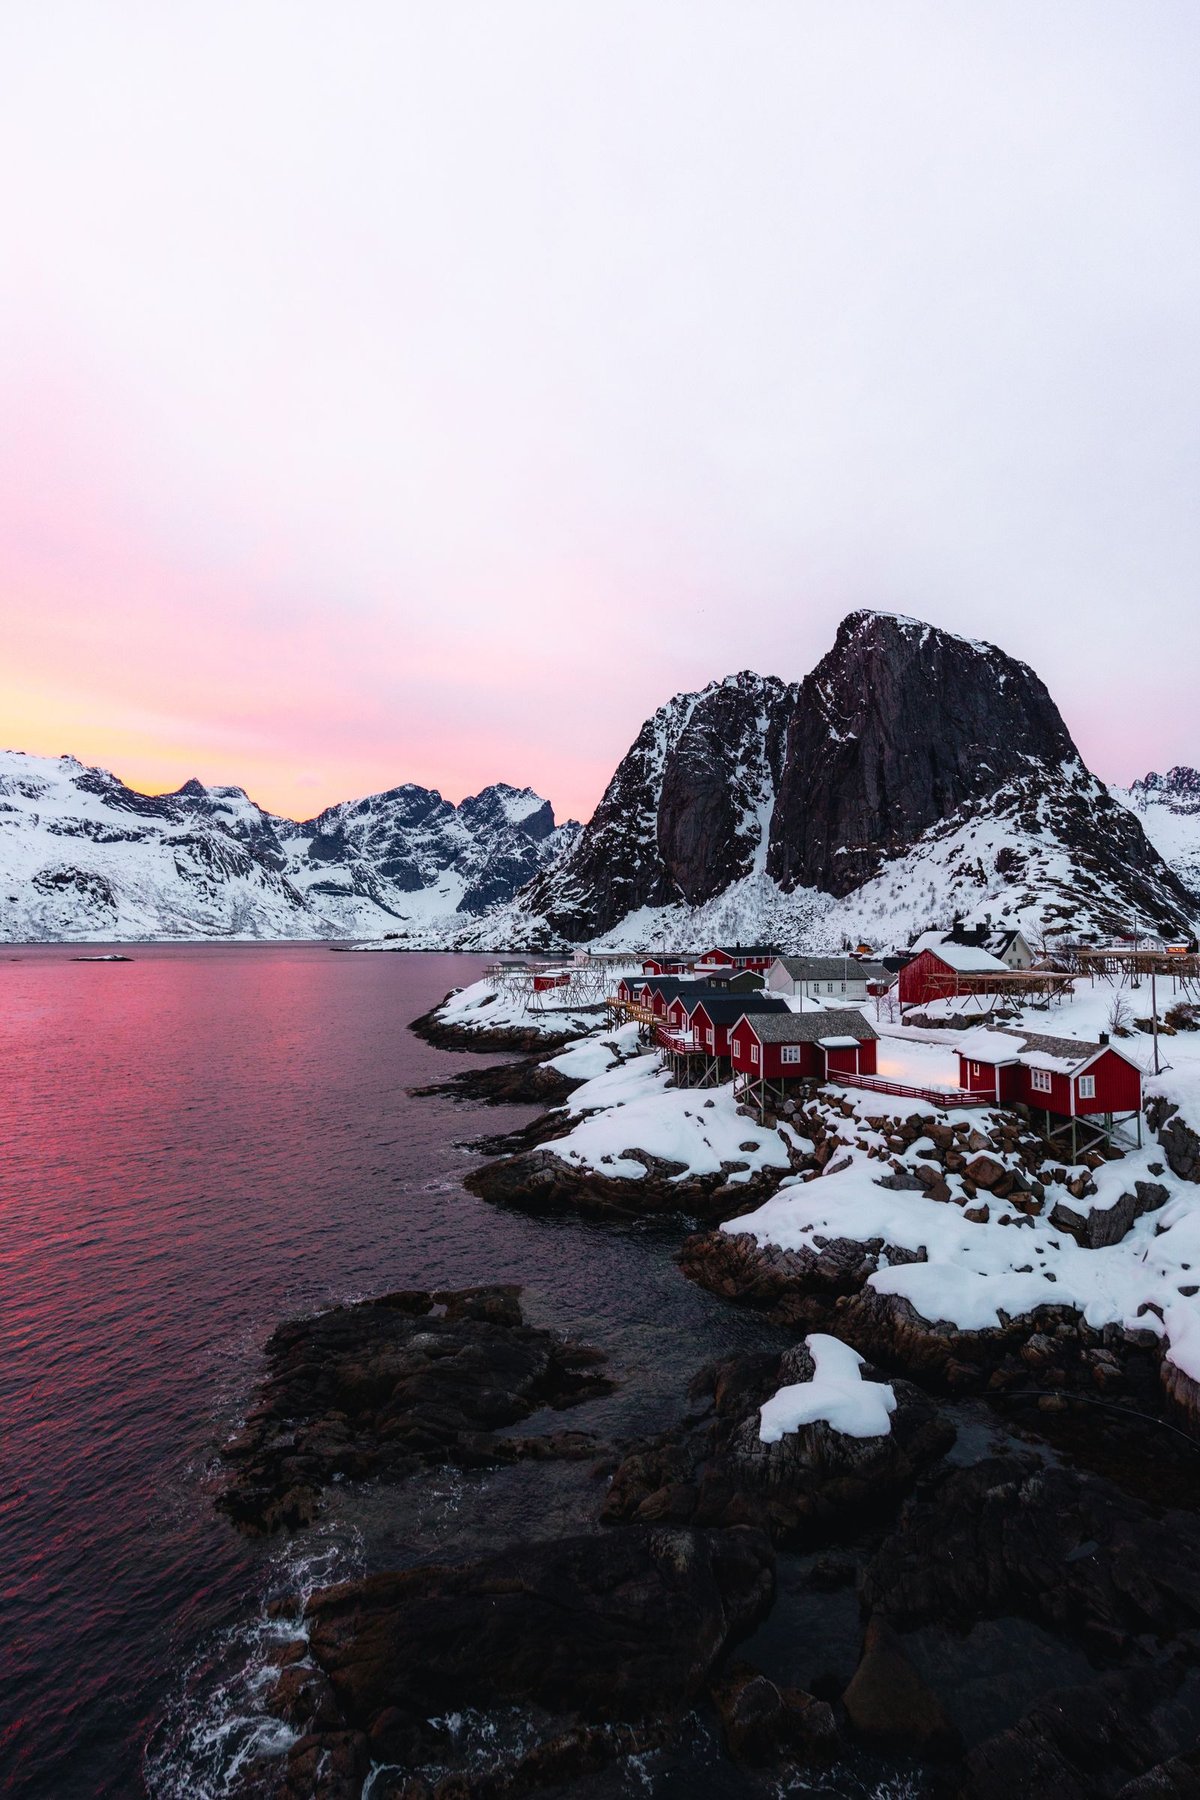
Hamnøy — the image that defines Lofoten photography. Shoot at dawn for the eastern light on the rorbuer, at night in aurora season for the northern lights above the peaks. Photo: Tomáš Malík / Pexels
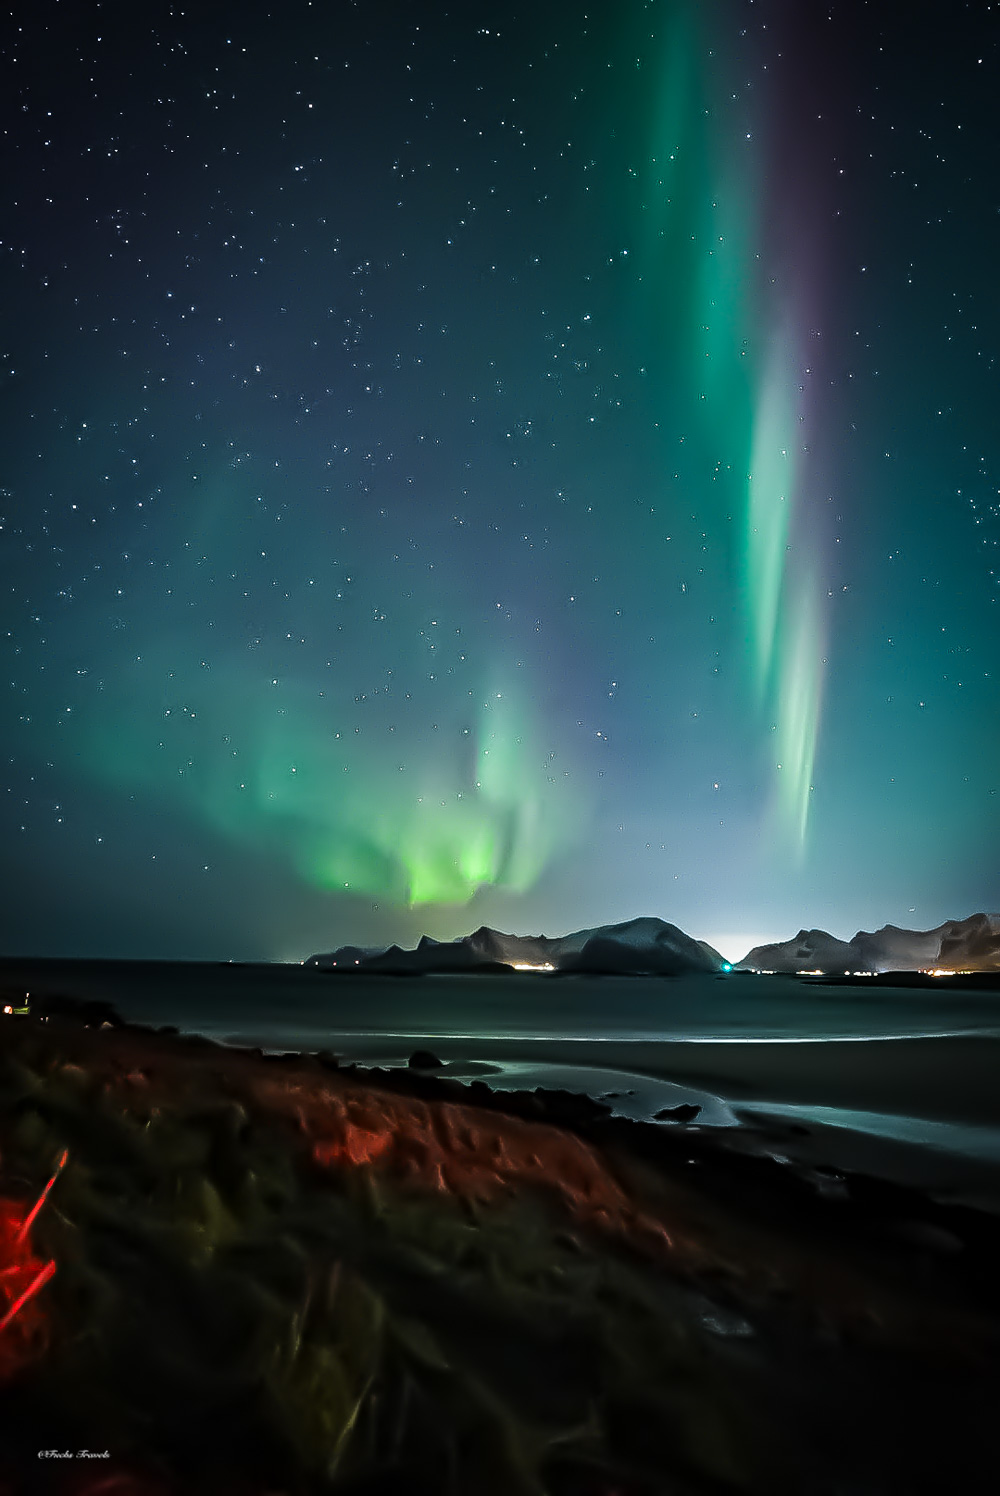
Lofoten aurora — September through March delivers regular displays; use a fast wide lens at f/2.8, ISO 3200, 10-15 seconds. Photo: Fuchs Travels
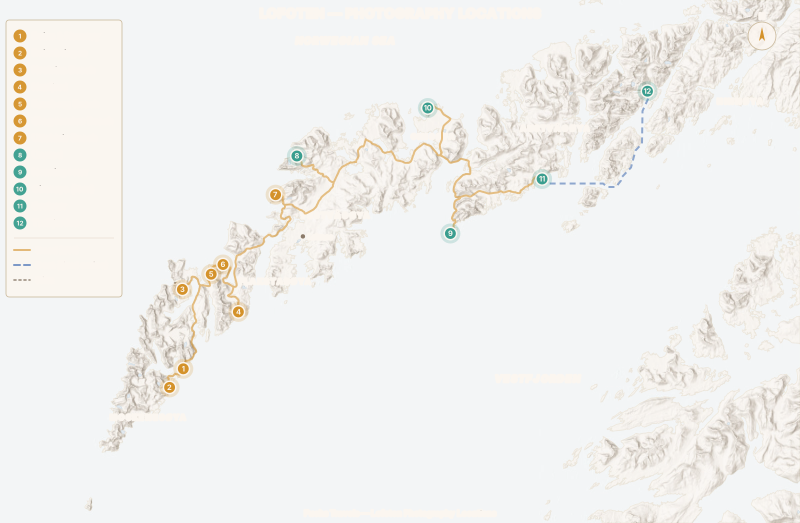
The 12 Essential Locations
1. Reine and Hamnøy — The Classic View
GPS: ●●.●●●●° N, ●●●.●●●●° E (Hamnøy bridge viewpoint)
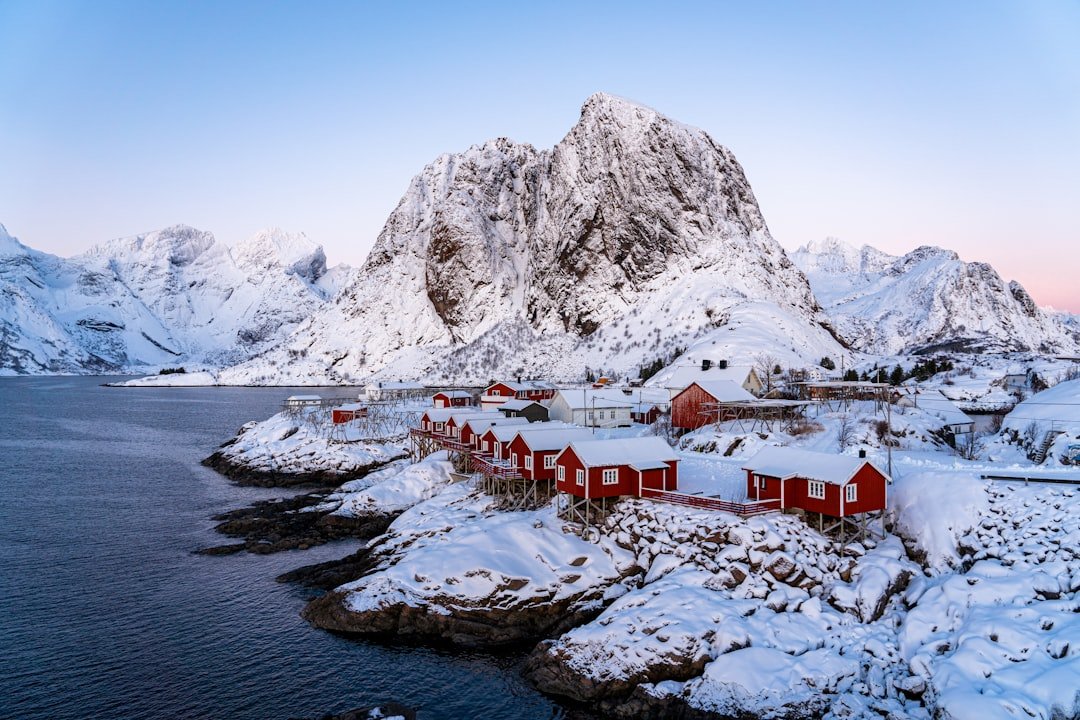
Winter twilight at Hamnøy — the blue hour lasts hours in December, creating an extended window for long exposures. Photo: Bingqi Huang / Unsplash
This is the image that sells Lofoten to the world. Red rorbuer cabins on stilts over the fjord, with the jagged peaks of Reinebringen and Olstinden rising behind them. The bridge connecting Hamnøy to Sakrisøy provides the classic angle.
Shooting Strategy:
- Dawn: Eastern light catches the mountains while the rorbuer are front-lit. This is the postcard shot
- Night (aurora season): Position the cabins in the foreground with the northern lights above the peaks. 14mm f/2.8, ISO 3200, 10–15 seconds
- Stormy weather: Don’t pack up when clouds roll in. Dramatic clouds wrapping around the peaks with moody light on the village produce more compelling images than clear blue skies
2. Reinebringen Viewpoint
GPS: ●●.●●●●° N, ●●●.●●●●° E (trailhead)
The aerial view of Reine village from 448 meters above sea level. The single most dramatic viewpoint in all of Lofoten.
Hike Details: Sherpa-built stone staircase of 1,978 steps (completed in late summer 2021), starting from the old road outside the Ramsvik tunnel just south of Reine. Allow 1.5–2 hours up, 1 hour down. The trail is on an exposed ridge — not recommended in high winds, ice, or poor visibility, and it routinely closes during spring snowmelt for avalanche risk. Check current status locally before building your shot list around it.
Photography: A 16–35mm captures the full panorama. Arrive 30 minutes before sunrise for blue hour — the fjord below turns cobalt while the peaks catch the first warm light. The elevation means you’re often above the fog, with cloud inversions below you in autumn.
3. Kvalvika Beach
GPS: ●●.●●●●° N, ●●●.●●●●° E (Torsfjorden trailhead parking, near Fredvang)
A secluded beach accessible only by a 45-minute hike over a mountain pass, flanked by cliffs and peaks facing open ocean — Ryten (543 m), the famous viewpoint summit, rises directly above the southern end. The trailhead parking at Torsfjorden is paid (pay on site; fills early in summer). This is raw, untouched Lofoten — the version that hasn’t appeared in a thousand Instagram posts.
The viewpoint from the pass before descending to the beach is often more photogenic than the beach itself. The classic shot is the white crescent of beach framed by the dark cliff walls, shot with a wide lens that includes the horizon.
Wild camping: Norway’s right to roam (allemannsretten) permits wild camping here. Spending a night for sunset-to-sunrise shooting is worth the effort — you’ll have conditions that day-trippers never see.
4. Nusfjord
GPS: ●●.●●●●° N, ●●●.●●●●° E
A preserved 19th-century fishing village, one of the best-maintained traditional settlements in Norway. The tight harbor with painted wooden buildings and fishing boats creates intimate, detailed compositions — this is not a grand landscape location but a human-scale one.
Best Light: Late afternoon when the low sun illuminates the harbor buildings. The warm wood tones against cold mountain shadow create rich color contrast.
Entry fee supports preservation.
5. Ramberg Beach
GPS: ●●.●●●●° N, ●●●.●●●●° E
White sand beach with turquoise water that defies its Arctic location. The contrast between tropical-looking water and snow-capped peaks behind is visually surreal — it shouldn’t exist at this latitude, and that’s the whole point.
Timing: Sunset. The western exposure means direct sunset light on the beach and mountains. In winter, the sun barely clears the southern horizon, creating extended golden hour that can last 2–3 hours.
6. Skagsanden Beach
GPS: ●●.●●●●° N, ●●●.●●●●° E
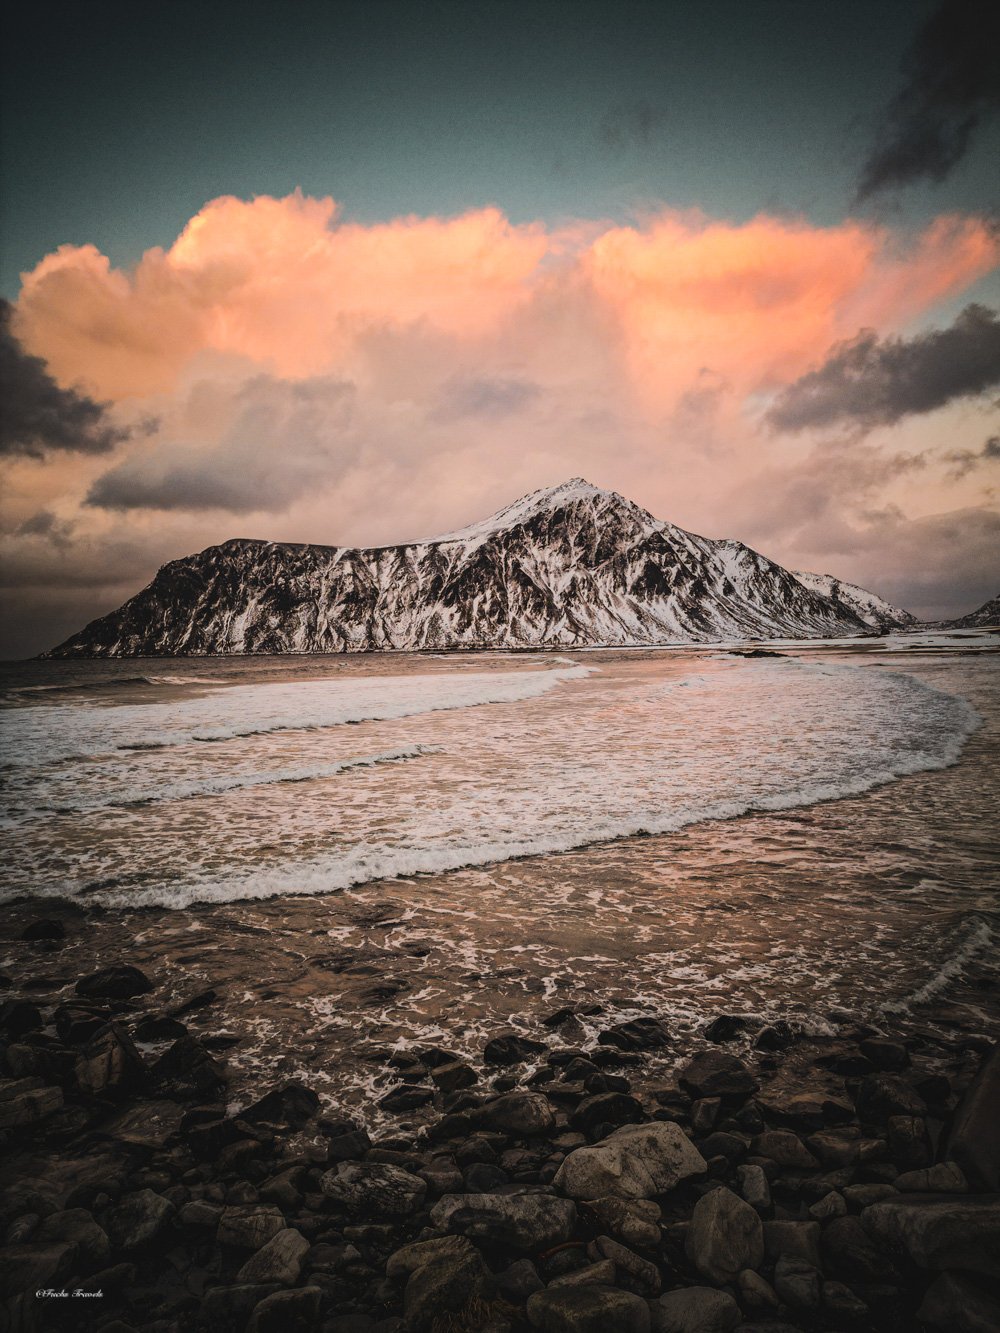
Skagsanden at sunset — Hustinden anchors the composition across the bay while receding surf lines draw the eye through the frame. Photo: Fuchs Travels
Lofoten’s premier aurora photography beach. Wet sand at low tide creates perfect mirror reflections, and the beach faces north — directly toward the auroral oval.
Aurora Setup: Position tripod at the waterline during low tide. Include the mountain ridgeline for foreground depth. 14–24mm, f/2.8, ISO 3200, 10–15 seconds for moderate aurora. Check tides on yr.no — you need low or receding tide for the reflective wet sand.
7. Uttakleiv Beach
GPS: ●●.●●●●° N, ●●●.●●●●° E
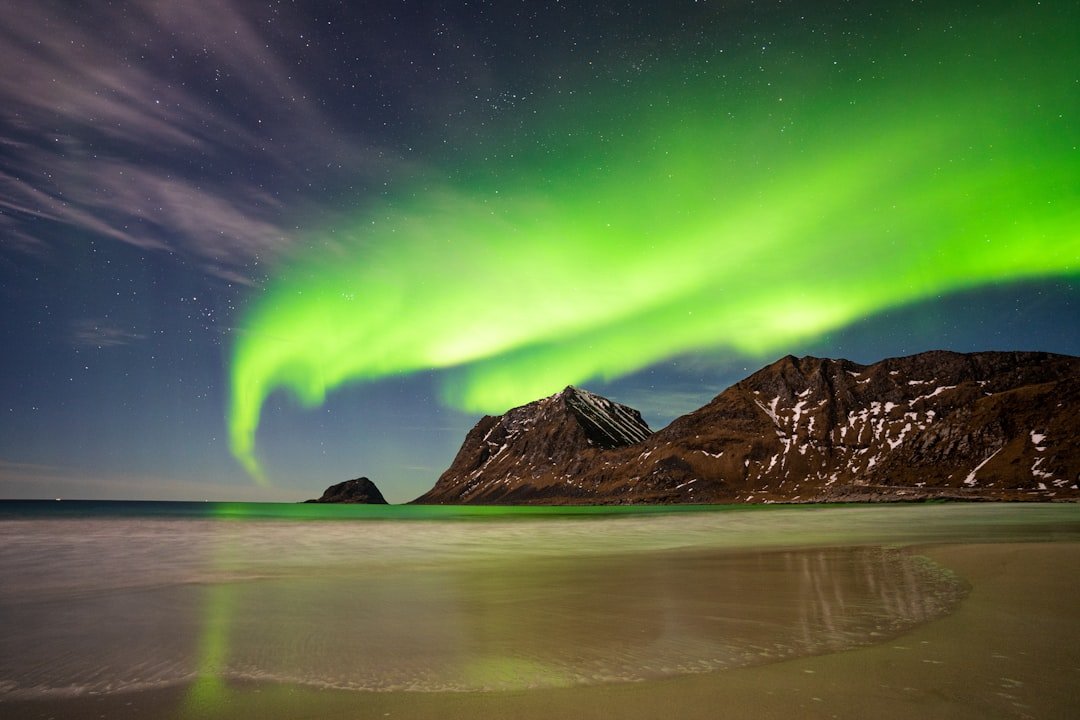
Neighboring Haukland Beach under the aurora — the wide, wave-smoothed sand turns into a mirror at low tide. Photo: David Becker / Unsplash
Outstanding aurora beach, famous for the “dragon’s eye” rock formation at the waterline. The smooth pebbles and distinctive foreground elements make compositions easy to build.
Key feature: The heart/eye-shaped rock formation on the left side. Position it in the foreground with aurora above for a classic Lofoten image. The road is icy and narrow in winter — arrive before dark to scout your composition in daylight.
Neighboring Haukland Beach sits just through the headland tunnel (a five-minute drive) and offers a wider sand expanse with the same northern exposure. Both beaches charge for parking — Uttakleiv via license-plate registration, Haukland per hour — so factor that into multi-night aurora campaigns.
8. Unstad
GPS: ●●.●●●●° N, ●●●.●●●●° E
One of the world’s northernmost surf beaches. Arctic surfers ride waves in 4°C water against a backdrop of snow-covered mountains. The combination of surfing culture and arctic landscape is visually unique — nowhere else does this juxtaposition exist.
Photography: A 70–200mm isolates individual surfers against the mountain backdrop. Shoot from the elevated viewpoint above the beach for context shots, then descend to the waterline for action.
9. Henningsvær
GPS: ●●.●●●●° N, ●●●.●●●●° E
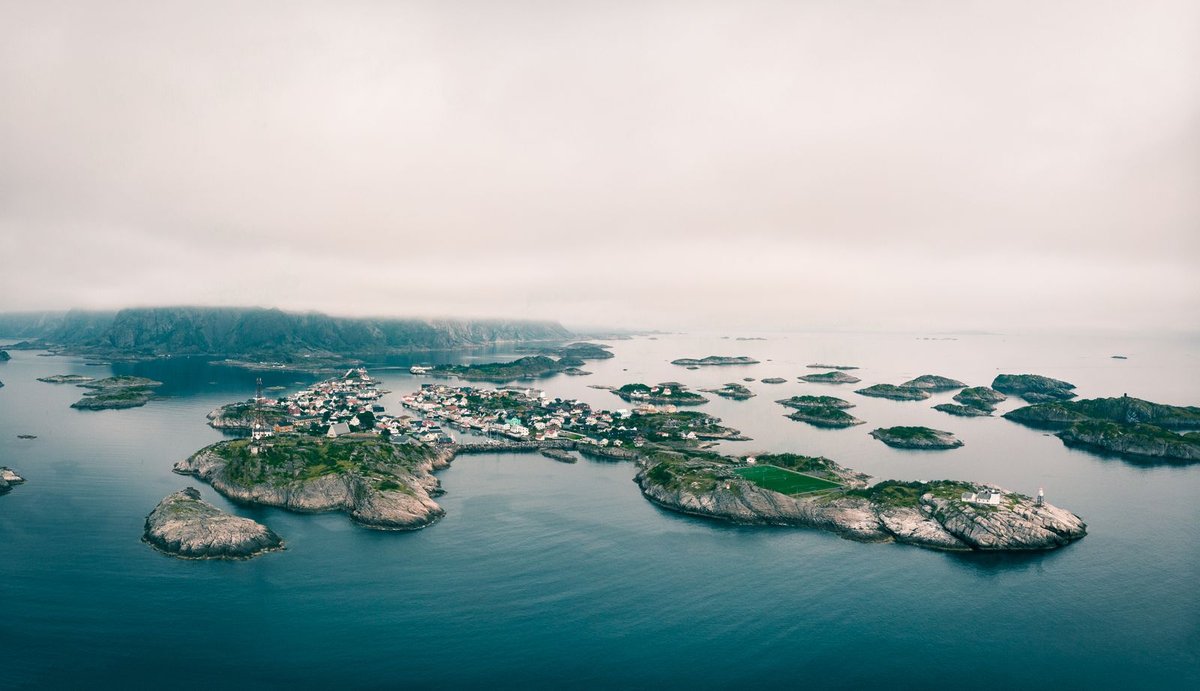
Henningsvaer — the fishing village is built across several small islands; the football pitch has become an iconic aerial subject. Photo: Clément Proust / Pexels
A fishing village built across two islands, known for a photogenic football pitch surrounded by water on three sides and mountains behind. Visible only from above or the approaching bridge, the pitch has become one of Lofoten’s signature drone images.
Drone etiquette: Drones are legal in Lofoten with Norway’s standard regulations (below 120m AGL, VLOS, no flying over uninvolved people). Henningsvær has become so popular for drone photography that residents have expressed frustration. Fly responsibly: early morning, limited duration, never over houses.
10. Gimsøya Beaches
GPS: ●●.●●●●° N, ●●●.●●●●° E (Hov, north shore)
The island of Gimsøya offers several beaches facing north — prime aurora orientation — with far fewer photographers than Skagsanden or Uttakleiv. The flat terrain and wide sand make for expansive compositions.
Advantage: Isolation. On any given February night, you may be the only photographer here. This is not a minor consideration.
11. Svolvær
GPS: ●●.●●●●° N, ●●●.●●●●° E
Lofoten’s largest town and main transportation hub. The harbor area at blue hour with fishing boats and the Svolværgeita (Svolvær Goat) rock formation above the town provides solid material.
Practical note: Grocery stores, restaurants, and fuel are here. Stock up before heading west toward the more remote locations.
12. Trollfjorden
GPS: ●●.●●●●° N, ●●●.●●●●° E (fjord entrance)
A narrow, steep-walled fjord accessible by boat or kayak. The entrance is only 100 meters wide, with vertical mountain walls rising 1,100 meters on both sides. It feels like sailing into a crack in the earth.
Access: Sightseeing and sea-eagle boat tours run from Svolvær year-round (about 2 hours round trip); kayakers put in from Raftsundet in summer. Bring a wide-angle lens — the walls are so close and so tall that even 16mm struggles to capture the full scale.
The Arctic Light Cycle: What No Other Destination Offers
Lofoten sits at 68° North — the magic number for Arctic photographic conditions. The light cycle here is fundamentally different from anywhere at lower latitudes, and understanding it is the difference between average and extraordinary photography.
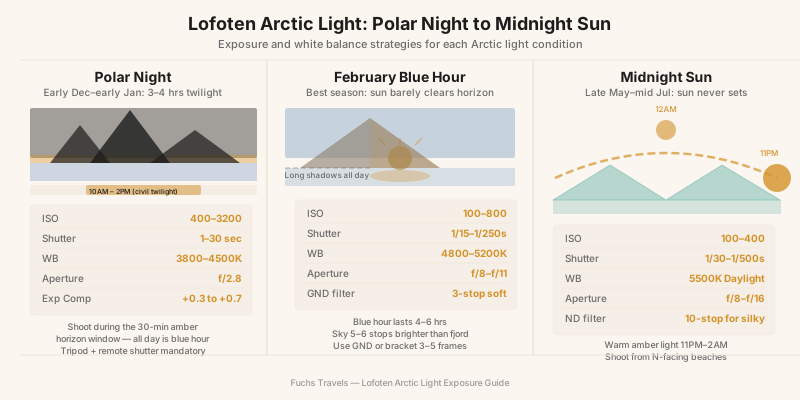
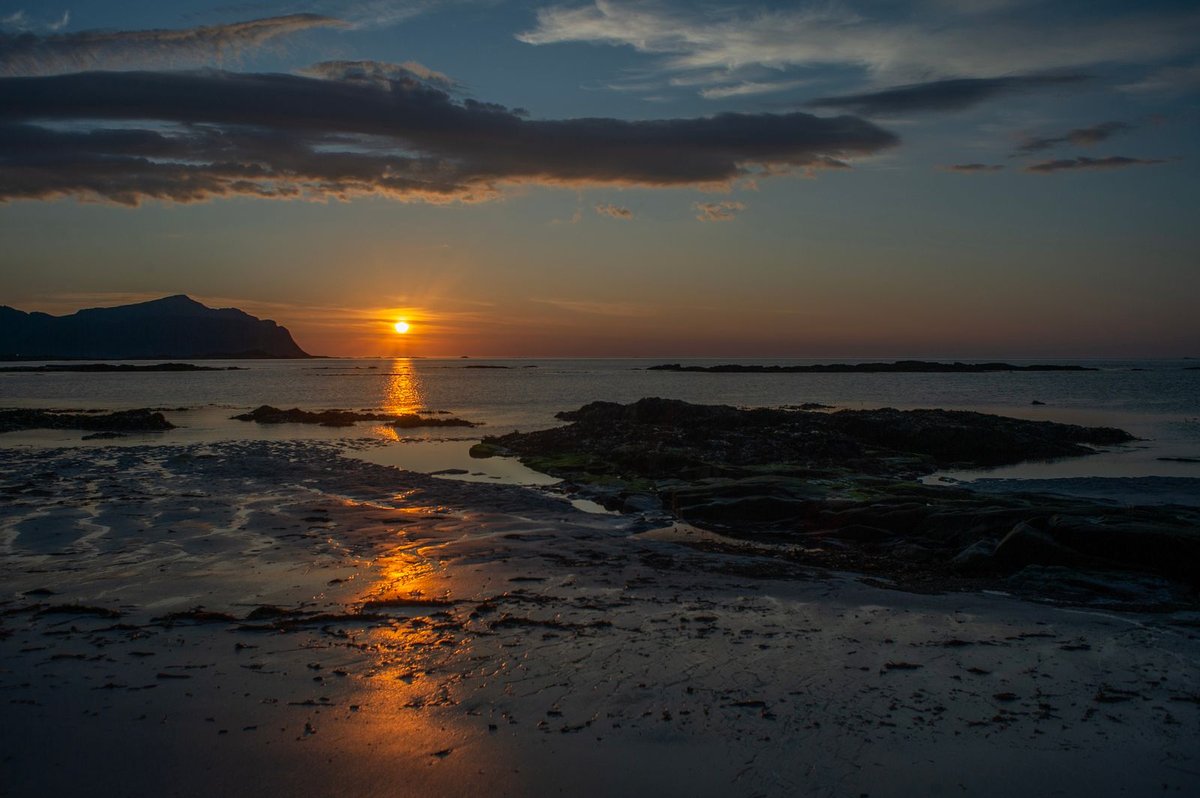
Midnight sun season (late May–mid July) — instead of setting, the sun skims the horizon, stretching golden-hour light through the night. Photo: Stein Egil Liland / Pexels
Polar Night (Early December–Early January)
For roughly a month in midwinter — about 7 December to 5 January in Svolvær — the sun doesn’t rise above the horizon at all. This is polar night — but it’s not pitch darkness. Civil twilight occurs for 3–4 hours around midday, and the sky goes through a remarkable sequence: deep indigo in the north, amber in the south where the sun almost grazes the horizon, and eventually a golden line that briefly touches the mountain peaks before retreating.
The exposure challenge: metering for this light requires overexposure of +0.3 to +0.7 EV. The amber horizon is much brighter than the dark sky and dark landscape below it. Use a 3-stop graduated ND if you want detail in both.
Aurora note: Aurora is almost nightly during Polar Night, at KP 1+. Lofoten at 68° N sits directly under the auroral oval. You don’t need high geomagnetic activity.
February Blue Hour — The Insider’s Month
Most photographers visit Lofoten in summer (midnight sun) or autumn (aurora + color). The real insiders come in February.
In February, the sun returns after polar night but barely climbs above the horizon. The result is an extended blue hour that lasts for hours rather than minutes. The quality of light is unlike anything at lower latitudes — a deep, saturated blue that wraps around the mountains and reflects off the fjords, with a low amber line to the south where the sun just grazes the horizon.
February conditions:
- Blue hour light for 4–6 hours per day
- Snow-covered peaks and beaches
- Aurora season still active (long dark nights)
- Temperature: -5 to -15°C
- Far fewer tourists than summer or autumn
The February combination of snow, blue light, and aurora is achievable in a single visit in a way that no other month provides. October and November offer aurora but no snow on the beaches. March is warmer but the light is already moving toward normal.
Exposure for February blue hour: ISO 100–800, f/8–f/11, 1/15–1/250s. The sky is 5–6 stops brighter than the fjord below. Use a 3-stop soft graduated ND or bracket 3–5 frames for HDR blending.
Midnight Sun (Late May–Mid July)
From about 26 May to 17 July, the sun never sets. This is the most popular tourist season with unique photographic conditions.
Midnight Sun Photography: Golden hour at midnight is genuine — low-angle warm light at 11 PM through 2 AM. The sun traces a circle near the horizon. Shadows are always long. Beach and mountain photography at midnight is feasible with full daylight.
Downsides: No aurora (too bright). No blue hour. Maximum crowds. Higher prices.
Aurora Photography Integration
Lofoten sits directly under the auroral oval, making it one of the best aurora photography locations on earth. Season runs September through March, with peak activity around the equinoxes.
Best aurora beaches: Skagsanden, Uttakleiv, Haukland, Gimsøya — all face north.
Reflections: Calm fjord water creates mirror aurora images. Check wind forecasts on Windy.com — calm nights are your opportunity.
Foreground matters more than the aurora: A KP 4 aurora with a rorbuer foreground beats a KP 7 aurora over a blank beach. Spend the daylight hours finding foreground elements; let the aurora intensity be what it is.
KP requirements: At 68° N, aurora is visible at KP 1–2. You don’t need high activity.
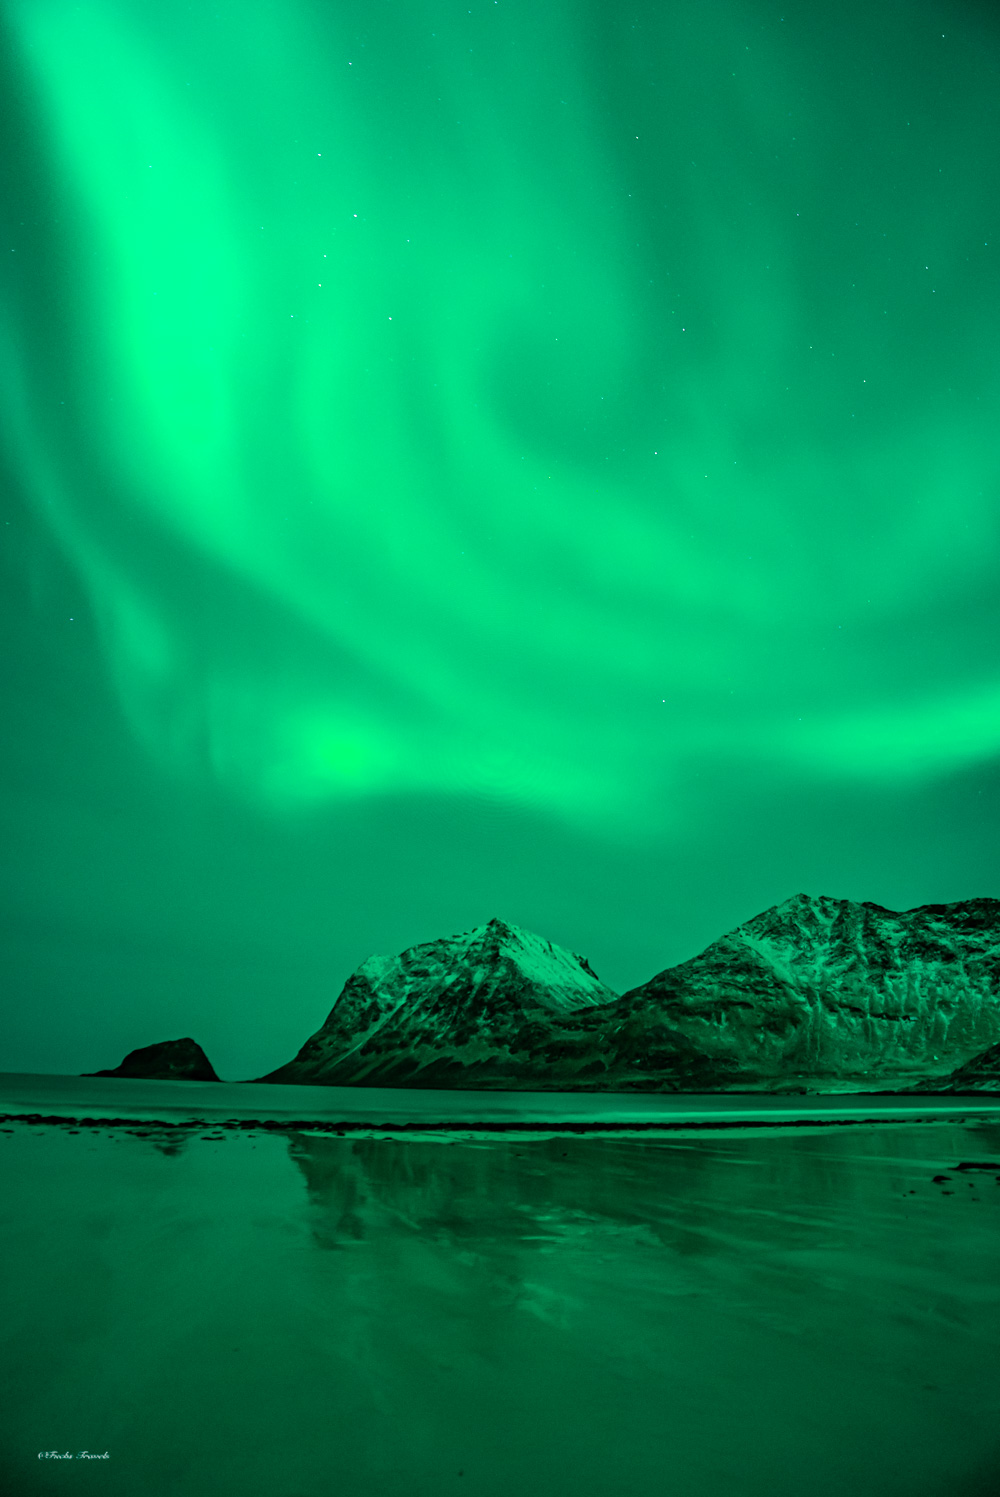
Haukland Beach — set up at the waterline at low tide, facing north. The wet sand creates a near-perfect mirror when the aurora is overhead. Photo: Fuchs Travels
Seasonal Photography Calendar
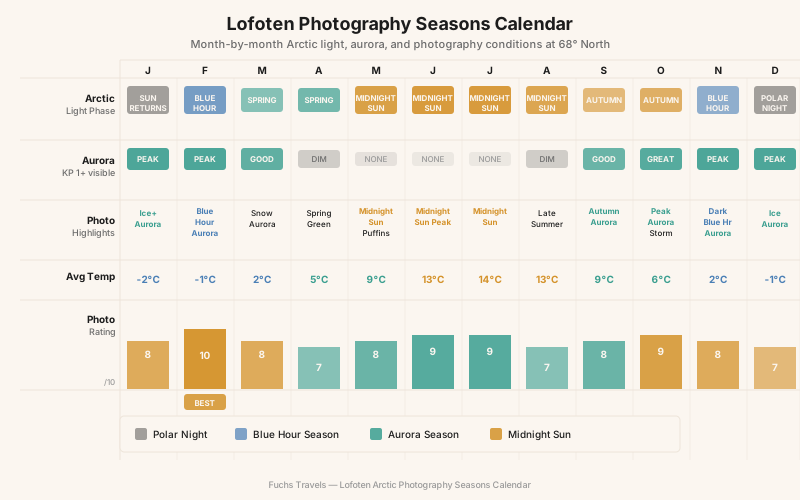
| Month | Arctic Light | Aurora | Avg Temp | Photo Rating |
|---|---|---|---|---|
| January | Polar night ends; low sun returns | Peak | -2°C | 8/10 |
| February | Blue hour returns | Peak | -1°C | 10/10 |
| March | Spring light | Good | 2°C | 8/10 |
| April | Normal spring | Low | 5°C | 7/10 |
| May | Long days | None | 9°C | 8/10 |
| June | Midnight sun | None | 13°C | 9/10 |
| July | Midnight sun | None | 14°C | 9/10 |
| August | Fading midnight sun | None | 13°C | 7/10 |
| September | Normal autumn | Good | 9°C | 8/10 |
| October | Autumn color | Great | 6°C | 9/10 |
| November | Dark season | Peak | 2°C | 8/10 |
| December | Polar night | Peak | -1°C | 7/10 |
February and October are the highest-rated months. February for blue hour + aurora + snow. October for aurora + autumn color + manageable conditions.
Self-Drive Logistics
Getting There
- Fly to Svolvær (SVJ) or Leknes (LKN) from Bodø or Tromsø via Widerøe
- Ferry from Bodø to Moskenes (southern Lofoten): 3.5-hour crossing, advance booking essential in summer
- Drive from Narvik: 3–4 hours via E10
The E10 Highway
The E10 runs the full length of Lofoten, approximately 170 kilometers. Budget 4–5 hours without stops — the road is winding and narrow, especially west of Leknes.
Winter driving: Winter tires are legally required whenever conditions demand them, and rental cars in northern Norway carry them from roughly mid-October through April (studded tires are permitted in Nordland in that window). Several bridges and side roads are single-lane with passing bays. Fuel stations are sparse west of Leknes.
Accommodation Strategy
Base yourself in two locations to minimize driving:
| Base | Best For | Duration |
|---|---|---|
| Reine / Hamnøy area | Locations 1–7 (western Lofoten) | 4–5 nights |
| Svolvær / Henningsvær area | Locations 8–12 (eastern Lofoten) | 2–3 nights |
Visitor levy: Norway’s visitor-levy law lets municipalities add roughly 3% to overnight accommodation, and the Lofoten municipalities were among the first to sign up (from summer 2026). Expect it on lodging bills and budget accordingly.
Rorbuer (fishing cabins) are the classic accommodation. Many sit directly on the water — a 30-second commute to your shooting position. Book well in advance for February and June–July.
Wild camping: Norway’s allemannsretten allows camping on uncultivated land (minimum 150m from inhabited houses, maximum 2 nights in one spot). For photographers, this is extraordinary: set up at Kvalvika Beach or a Gimsøya beach and shoot sunset-to-sunrise without driving.
Budget Estimate (7-Day Trip)
| Expense | Daily | 7-Day Total |
|---|---|---|
| Car rental (4WD) | NOK 900 | NOK 6,300 |
| Fuel | NOK 250 | NOK 1,750 |
| Rorbuer / accommodation | NOK 1,100 | NOK 7,700 |
| Food (self-catering) | NOK 400 | NOK 2,800 |
| Ferries/entry fees | NOK 150 | NOK 1,050 |
| Total | NOK 2,800 | ~€1,700 |
Drone Regulations in Norway
Norway has some of Europe’s most photographer-friendly drone regulations, but with important caveats for the Lofoten context.
General regulations (Norway is not an EU member, but it applies the EASA drone framework through the EEA — in force since 2021):
- Open category (drones under 25kg): No permit required in most areas; complete the free online A1/A3 exam
- Maximum altitude: 120 meters AGL
- Must maintain visual line of sight
- No flying over uninvolved people
- Operator registration with the Norwegian Civil Aviation Authority (Luftfartstilsynet) at flydrone.no is required for any drone over 250g or any drone with a camera
- No-fly zone within 5 kilometers of airports without air traffic control permission — both Lofoten airports, Leknes (LKN) and Svolvær Helle (SVJ), have these zones, which puts the towns of Leknes and Svolvær themselves off-limits
Lofoten-specific considerations:
- Naturreservater (nature reserves) and designated bird protection areas prohibit drone flight during the nesting season (roughly mid-April through July, with some reserves extending later). This is significant: the outer islands of Værøy and Røst — home to Lofoten’s puffin and sea-eagle colonies — are largely covered by these protections.
- There is no separate “commercial” drone permit under the EASA-derived rules — most photography flights fall in the Open category, though Specific-category operations (heavier drones, beyond-line-of-sight) need an operational authorization
What this means for photographers:
- Winter and early spring (October-March): Drone photography is largely unrestricted outside designated reserves. The entire Lofoten island chain is accessible for aerial work during this window.
- Summer (May-August): Coastal areas with seabird colonies are restricted. Inland mountain environments and open fjords remain accessible.
- The famous Reine viewpoint area: No specific restriction, but the narrowness of the fjord and proximity to habitation requires careful flight path planning.
Recommended approach: Register as a drone operator at flydrone.no before arrival and check Luftfartstilsynet’s interactive safe-to-fly map for current airspace restrictions in real time. For winter visits specifically, the regulatory environment is favorable — you can capture sweeping fjord panoramas, the rorbuer villages from above, and the aurora reflected in harbor ice with minimal restrictions outside protected bird areas. The combination of dramatic topography (mountains rising vertically from sea level) and permissive winter regulations makes Lofoten one of the best drone photography environments in Europe.
Cold Weather Gear for Photographers
Lofoten in winter is manageable but demands preparation. Standing stationary on a beach at 2 AM waiting for aurora in -12°C with wind chill is entirely different from walking around a city in the same temperature.
The Lofoten Cold Kit
| Item | Recommendation | Notes |
|---|---|---|
| Base layer | Merino wool (Icebreaker, Smartwool) | No cotton. Ever. |
| Mid layer | Down or synthetic insulated jacket | Packable for variable conditions |
| Outer shell | Gore-Tex hardshell (jacket + pants) | Wind and waterproof |
| Boots | Insulated to -25°C | Neoprene-lined for beach work |
| Gloves | Liner gloves + expedition mittens | Liner for dial access |
| Photography gloves | Vallerret Markhof Pro | Flip-back fingertips |
| Head | Balaclava + hat | Full face coverage in wind |
| Hand warmers | HotHands chemical warmers | Place inside mittens |
Camera Cold Weather Protocol
- Carry 4–6 batteries. Cold halves battery life
- Keep spare batteries in inside pocket against your body
- Don’t breathe on the viewfinder — it fogs and freezes
- When returning indoors, seal camera in a ziplock bag before entering. Let it equalize 30 minutes before opening
- Carbon fiber tripod legs conduct cold less than aluminum
Recommended Camera Gear for Lofoten
| Item | Recommendation | Why |
|---|---|---|
| Camera body | Sony a7R V, Nikon Z8, Canon R5 II | Weather-sealed, high DR, strong high-ISO |
| Wide zoom | 14–24mm f/2.8 | Aurora, beaches, mountain panoramas |
| Standard zoom | 24–70mm f/2.8 | Villages, harbors |
| Telephoto | 70–200mm f/2.8 | Mountain compression, isolated peaks |
| Fast prime | 20mm f/1.8 or 14mm f/1.8 | Aurora (wide + fast = short exposure) |
| Tripod | Gitzo Systematic or RRS TVC-34 | Must handle wind |
| Filters | NiSi V7 with 6-stop + 10-stop ND, 3-stop soft GND | Waterfall, cloud streaks, sky balancing |
| Bag | F-stop Tilopa or Shimoda Explore 40 | Weatherproof, rear access |
The Luminance Range Problem
Lofoten’s primary exposure challenge is extreme contrast: the sky above the peaks may be 5–6 stops brighter than the shadowed fjord water below. You have three options:
- Graduated ND filter (3-stop soft GND): Balances the exposure at capture
- Exposure bracketing (3–5 frames): Merge in Lightroom. Maximum data, maximum flexibility
- Single RAW with high-DR sensor: Sony a7R V handles 14+ stops, but pushes files hard
For aurora photography, graduated filters don’t work — the aurora extends across the entire sky. Expose for the aurora and pull foreground shadows in post.
Field Exercises
Exercise 1: The Blue Hour Test
Shoot the same Lofoten scene at three times: full daylight, golden hour, and blue hour. Compare the mood, color palette, and emotional impact of each. Blue hour at 68° North is unlike blue hour anywhere else.
Exercise 2: The Weather Series
Over 3–5 days, photograph the same viewpoint (Reine bridge or Skagsanden Beach) in every weather condition you encounter: clear, cloudy, snowy, foggy, stormy. Compile the series to show how weather transforms a single location.
Exercise 3: Aurora Foreground Variety
On a single aurora night, shoot the northern lights from three different beaches or viewpoints with three different foreground elements (rorbuer, rock formation, mountain silhouette). Study how foreground choice changes the story of the aurora image.
Exercise 4: The Intimate Lofoten
Put away the wide-angle lens for an entire day. Shoot only with a 50mm or longer. Find the details: weathered wood texture on rorbuer walls, dried cod on racks (stockfish), rope coils, boat hulls, lichen on rocks. Build a portfolio of Lofoten’s details rather than its grand landscapes.
Exercise 5: The Low Light Calibration
On your first day in Lofoten, before the sun sets, photograph the Reine viewpoint. Then repeat the exact same composition at golden hour, blue hour, and full dark (with or without aurora). This four-image comparison will recalibrate everything you think you know about how light changes a location.
Conclusion
Lofoten is a destination where the photography almost makes itself. The peaks are dramatic, the light is extraordinary, and the cultural elements — rorbuer, fishing boats, stockfish racks — provide ready-made foreground. The real challenge is not finding a good composition. It’s having the stamina to stand in freezing wind at 2 AM waiting for the aurora, or the flexibility to abandon your plan when the weather redirects you to an unplanned location that turns out better than anything on your shot list.
Come in February for the blue hour and aurora combination. Come in June for the midnight sun. Come in October for aurora and autumn color. Whatever season you choose, Lofoten delivers more photographic density per kilometer than almost any other landscape destination on earth.
The islands reward those who persist.
Plan the trip — Compare Lofoten month by month in the Seasons Planner, then read Mastering Natural Light and Packing Camera Gear for Expeditions before you go.